Wednesday, June 27, 2012

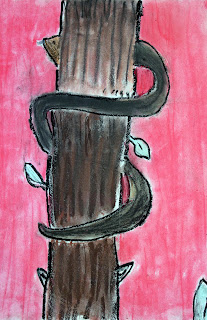
Chalk Pastel Slithering Snakes

This weeks lesson was great.  The kids really had a good time making these snakes.  I think they truly knocked this lesson out of the park! 

We used pencil to first draw our snakes and background.  I then showed them a lesson on how to blend and properly use chalk pastels.  We had alot of students who were using it for the first time, so they quickly learned how fast they can smudge and make a big mess on your paper. 

They got to work creating their snakes and having them weave behind and in front of the tree.  that part was a little tricky, but they all got through it and the final results were very impressive.  Here are some of the snakes:


This one is my sample

Monday, June 25, 2012

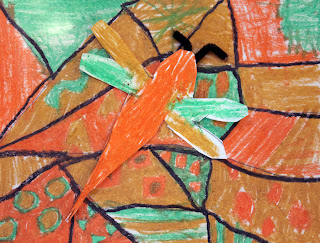
Oil Pastel Dragonfly

Last weeks lesson was great. I love seeing all the different results.  Of course, there is always someone who boycotts the dragonfly, so I gave them the creative freedom to pick whatever insect they wanted. 

We started off by making some hard lines with our pencil to divide our paper into sections.  After each section was made, the students had to pick between 3-5 oil pastels and start creating patterns in each block. 

The boys of course tried to take shortcuts and color in the sections with a solid color, but once I found out their tricks, I kept it so they were only allowed to color up to 2 in solid colors!

I told them to think about geometric shapes to create their patterns and to also create patterns using colors. 

Once they colored the background they started on their dragonfly.  They used the same color on the dragonfly as they did with the background so it looked camouflage on the paper.  We added some cute pipe cleaner antennaes and added some 3d glue stickers to have it look like it landed on the paper!  Here are some results.


Thursday, June 14, 2012

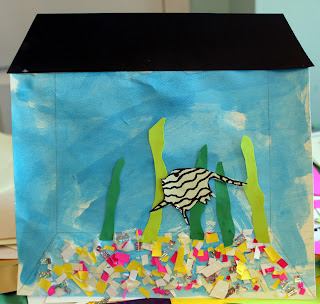
My Aquarium

This lesson was so much more involved than I had anticipated.  When I first tried the lesson myself, I didnt realize from a childs perspective, the little speed bumps along the way.  I quickly found out when I tested it out on my first class!

I really wanted this to be a 1 hour lesson, but really it should have been divided into 2 classes.  The first step was to make the ruler lines on both sides and the bottom to represent a fish tank.  It caused so much confusion the first class, that I ended up making the lines myself for the other classes.  I wanted to teach them  how to appropriately read the ruler but to accomplish all of this in an hour class is impossible. 

Next, we painted the background with watercolors.  I asked the students to paint in blues and green. 

I then set up a table and called it my "Creation Station".  It was covered with a ton of different colored papers.  They had to first make their gravel or stones for the bottom of their fishtank.  After that, they went to work creating their fish tank.  They cut up the paper for the gravel and stones and then used green paper for their seaweed.  The next step was to create their fish and sea-life in the fish tank. 

Here are some results:


This one above is my example.  If  you notice, I didnt realize I had put my seaweed up against the glass.  It should have been
embedded in the stones.  See, even I make mistakes!!


Friday, June 8, 2012

Student Wood Block Owls

Here are some results of our wood block owls.  It turned into a 2 week project, 2nd one of this session (which is highly unusual) but I have alot of students who LOVE art and take their time, and it shows in their work.  We used acrylic paints on cut and sanded pieces of wood.  We probably could have spent even more time on it if we added embellishments and glitter and cool effects.  Some students got to use glitter because they finished earlier and it made their owls very whimsical. 

I am very please with the outcome of our little hoots!  Here are some results.